Step 1 - Provision new Google Analytics property and tracking code
1. Go to http://analytics.google.com/
2. Click on ADMIN

3. Select the most appropriate Account (e.g., "PCA Churches" or "OPC Churches"), then click on Create Property

4. Input Website Name, Website URL, Industry Category, and Reporting Time Zone, then click Get Tracking ID. For Industry Category, use "People and Society." For Reporting Time Zone, use the time zone where the church or organization is located.

5. Once you get to a screen like the one below, you're ready to move on to the next step

Step 2 - Install GADWP plugin on WordPress site and link GA tracking code
1. Go to the Add Plugins screen, search for "gadwp," and click Install Now for the plugin called "Google Analytics Dashboard for WP by ExactMetrics (formerly GADWP)," then click Activate once it is finished installing

2. Click on Google Analytics > General Settings

3. Click on Authorize Plugin

4. Click on Get Access Code

5. Make sure to select the correct Google account if you're logged in to multiple Google accounts simultaneously (note: the email address in the image below is just an example)

6. Click Allow on Google's sign-in screen

7. Highlight the code provided by Google Analytics and copy

8. Paste access code in WordPress, then click Save Access Code

9. Click on Lock Selection

10. Click on Save Changes

11. Clear the website cache (for example, click on Purge SG Cache)

12. Validate that the tracking code is working by going to REAL-TIME > Overview, visiting the website in another browser window (or device), and verifying that Google Analytics is tracking the user

Step 3 - Configure GADWP plugin to ensure customer can use Dashboard widget
1. Go to Google Analytics > Backend Settings

2. Check the boxes to ensure that Editors & Church Admins (aka Org Admins or Biz have permission to see stats (IMAGE BELOW NEEDS TO BE UPDATED):

3. Click on Save Changes

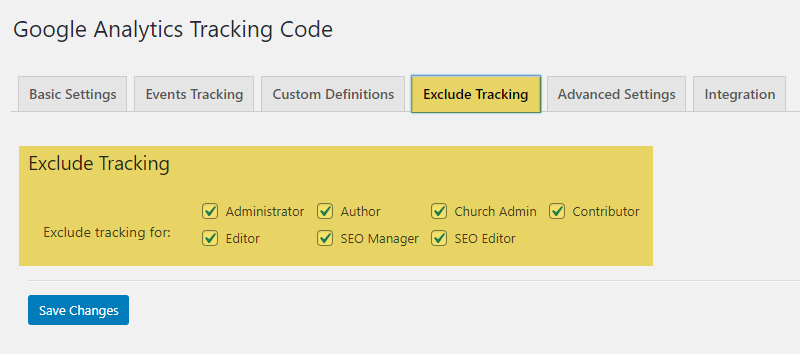
Step 4 - Exclude tracking code for logged-in users
Was this article helpful?
That’s Great!
Thank you for your feedback
Sorry! We couldn't be helpful
Thank you for your feedback
Feedback sent
We appreciate your effort and will try to fix the article